Impromptu Flash Accessory for Holiday Family Portraits!

Packing for a Christmas or family holiday trip can be a bit hectic...sometimes you might even forget a modifier for your Speedlight.

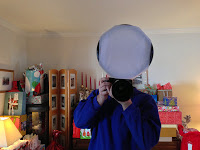
Hal scooting with his homemade modifier.

Now what you are about to see is what we like to call "bush league" but the modifier/soft box works extremely well and you can definitely find the materials at grandma's house! Depending on the size of your flash you can also create any size you want.

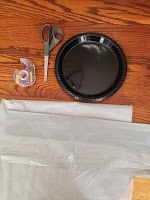
For a very simple modifier here are the items you will need:

  • 2 plastic or paper plates (you can choose dinner plate size or a dessert platter depending upon the size of your flash and the "softening" power you want)
  • Gift box tissue paper (white is most most versatile but a colored tissue will be just like a colored gel)
  • Tape 
  • Scissors

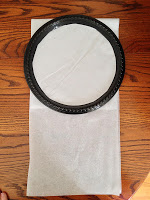
All of the pictures below show the entire process. Start by cutting out the inside or flat portion of the plate. Try to keep as much of the cut out portion because you will use it later in the process. The ring you are left with is the frame for the modifier.

Cut or fold the tissue paper into a square about the same size as the frame/ring.  One piece will do just fine but if you want to make the light more even, add an additional layer or two.  It is always a trade-off though when you add layers.  The light becomes more even but you will lose more of the flash's effective power.  For example, when I made this example, I used four layers of tissue and lost approximately 2.5 stops of light.

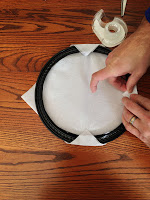
Tape the tissue to the frame.  You can get all "gucci" with it but I used four pieces and have a nice, tight surface.

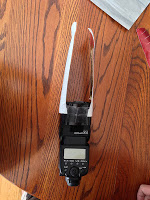
From the cutout portion of the plate, fashion a rectangle or two.  Put onto the end of your flash to act as an attachment collar.

With the other plate cut out two rectangular supports.  Tape one end of each to the attachment collar on the flash.  The final step is to tape the supports to the plate/modifier.  When you put the flash on your camera, I like to change the zoom to Manual at about 50mm.

Simple but effective.  When we talk about light's quality of being either hard or soft, the only factor that matters is the size of the light source relative to your subject (this is, of course, controlled by the size of the light source and the distance from the source to the subject.)  The bare surface area of the flash is @ 3.7 square inches.  After adding the "bush league" modifier the surface area is @64 square inches. That is an increase of 17X.  One of the biggest issues with many modifiers is they do not really change the surface area by that much. But 17X?  That is effective!

Another nice feature of this homemade version is it is extremely light.  Whenever you add an attachment to your flash, always consider weight.  If the modifier is too heavy or has a lengthy moment arm you can easily damage your flash.

Alaska Time Lapse

While I was looking over some images for yesterday's blog I found this sequence.  Thought it would make a nice simple time lapse.

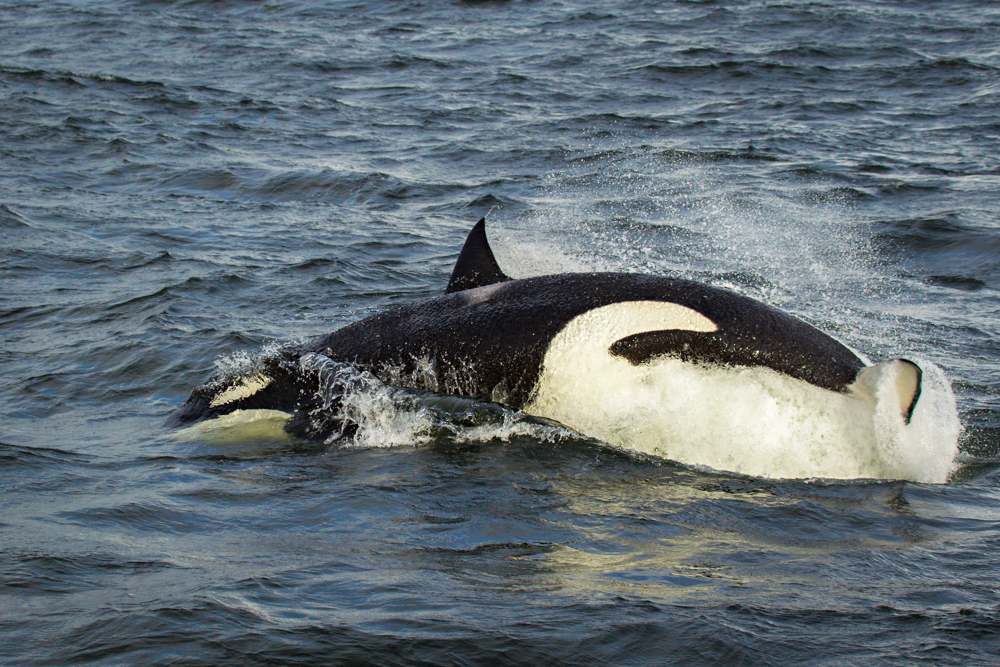
Gorgeous Alaska day and a slow humpback whale dive.  Shot the sequence on my photo tour with a Canon 1D Mk IV and an EF 70-300 4.5/5.6L.

Put the time lapse together with Lightroom. Recommend the 720 quality option.

Ambrosia Coating: Rolling it on.

Ambrosia Coating: Application to Canvas with a roller.

from Hal Schmitt on Vimeo

A quick video showing the process and disussing tactics, techniques, and procedures for effective canvas coating with a roller.  For this demo, I used a Canon ipf 6350, Alpha Strike's new Lucia/Lucia EX ready canvas, and Ambrosia.

With this new coating you can also coat water resistant photo and art papers;archival protection without glass or glazing, very, very cool.  More videos on those soon.

For all of the product specs check out Ambrosia.

Elephorm Universal Player FAQ - For Hal's Lightroom Tutorial

Backpack: Universal Player FAQ

We have received a lot of questions regarding how to use the Elephorm Universal Player with Hal's Lightroom videos.  Here is the entire FAQ for the player with step by step description and images.

For those who might not be familiar Hal's Lightroom training is available via streaming video or you can download the content to your desktop/laptop.  If you download the interface to play the videos is the Universal Player.

//

Currently, you can stream all of the videos on your idevices but the content is not downloadable there yet.  An iOS app for iPad/Phone is almost ready though.

Thank you to everyone for providing the great feedback and reviews!

If you have not checked the training out yet, you can find it here

Elephorm - Lightroom

Universal Player FAQ

What is the Universal Player ?

If you have access to Internet, you can view our tutorials with no installation needed. But what if you want to train yourself on the train, the plane or in an hotel with sluggish internet access ? That’s when our Universal Player comes in handy. We’ve made a super simple to follow step-by-step.

Player installation

Connect to en.elephorm.com with your email and password, and locate the Universal Player Blob, as shown on picture below. Click on the Install button and follow instructions.

Player Login

After installation, the player will open automatically. You will then be prompted to accept the End User License Agreement (EULA) and to enter your details (same email and password you use to connect to en.elephorm.com)

Your library

You are now in your library, and you’ll be able to download your tutorials to HD in a few clicks.

  • Click on the Arrow Icon on the right to initiate download
  • On first Download, you’ll be prompted to choose a directory. We suggest you use the one proposed, and avoid external HDs. Once chosen, all tutorials you may download must go into the same folder.
  • The flashing Arrow and the VOD label that turns into a HDD label means your videos are being transferred to your HD.
  • If you see a VOD label next to the Arrow Icon, you didn’t downloaded yet, but can view as you would on the site, that is streaming.

Please move on to next section to understand what’s happening behind the scenes

Understanding the Player

NOTE

: To access the Lessons Summary shown in the picture below, you just have to click on the Chapter Access button in the Library.

A few things you should know:

  • The player will download all the videos in a folder that should not be moved or renamed. You can choose which directory the folder will be created to, we suggest you should use the one first proposed.
  • Some tutorials have 200 chapters, and an over 15 hours duration. It will take some time to download, so please plan ahead !
  • The player downloads a maximum of 3 videos at a time, to save bandwidth. These three videos cannot be watched until completely downloaded (a progress bar shows download status, see picture below), all other videos, either downloaded or not can be viewed.

Still need help ?

Please feel free to contact us on en@elephorm.com !

Landscape at f/4? Know your DOF

I am a huge believer in understanding and practicing the basics and the fundamentals of photography.  Moreover, it seems most difficult tasks in life, including photography, come down to how well can you execute the basics. To that end, I would like to discuss one of the most common practices I see in the field when shooting landscape, stopping down for no reason. 

The conventional wisdom is to stop down when shooting landscape to increase depth of field (DOF).  Although stopping down does increase DOF it is not always necessary to do so and may, in fact, hinder your ability to make the best shot. 

DOF can be an incredibly complicated and confusing topic but it is worth spending a small amount of time talking about the primary contributors to DOF.  Most photographers are taught that DOF is controlled by aperture; the wider the aperture the shallower the DOF and vice versa.  What is not commonly taught are the two other primary variables that influence DOF, focal length (of the lens in mm), and focal distance (physical distance from shooter to focal point.) 

Just as every photographer quickly memorizes the aperture/DOF relationship they should do the same with focal length/DOF and focal distance/DOF.  So a little homework, memorize the following.

  • The wider the aperture the shallower the DOF
  • The longer the focal length the shallower the DOF
  • The shorter the focal distance the shallower the DOF

and the opposites

  • The narrower the aperture the deeper the DOF
  • The shorter the focal length the deeper the DOF
  • The longer the focal distance the deeper the DOF

One of the best ways to see these rules in action  is to use a DOF calculator and play around.  If you want to go "old school" there are "whiz" wheels out there to show the relationships.  But since this is mid 2012, I recommend finding a DOF app for your smart phone or device.  There are a huge number of these apps available just search for "DOF calculator" and download. 

After playing with a DOF calculator app for just a small amount of time, you will be amazed how quickly you learn the rules and begin to visualize constructing DOF for every shot you take.  When you know the rules and relationships of DOF you will approach your shots from a position of knowledge and you will, most likely, modify some of your accepted habits and practices.  You might even decide to take your DOF calculator app with you on location and run some numbers before you shoot.  I do not think you will do this all the time but if you need some intel, back up, or encouragement break out the app and "run the numbs." 

Recently, I shot some landscape in Alaska and used my understanding of DOF to shoot handheld landscape at f/4 with everything in the shot acceptably in focus.  This goes against the conventional wisdom but it worked perfectly.  The shot I ended up with is shown below.

For this shot I used the focal point shown @1000' from me, 43 mm focal length, and an aperture of f/4.  I shot a bracketed series for HDR and did it handheld as my tripod was not available.

If I had followed the conventional wisdom I would have stopped down to f/16 and would have had the situation shown below.

f/16 would have given me plenty of DOF but a shutter speeds of 1/60, 1/250, and 1/15.  These are, of course, too slow for my handheld situation.  I could have increased my ISO to yield faster shutter speeds but I did not want the additional noise, especially when shooting for HDR.

Instead of changing ISO, I changed aperture and opened up to f/4 which gave me the situation shown below.

f/4 also gave me plenty of DOF and shutter speeds that I could work with hand held.  Because my focal length was 43mm with a focal distance of 1000', changing aperture did not have an appreciable effect on this shot's practical DOF.  As a result, the entire shot is acceptably in focus, even the foreground as it is greater than 52' from me.  Sure f/16 gave me 38' more DOF but it was irrelevant.

Now there will be times and places this does not work but if you understand the basics you will recognize them quickly.  When you do you will find the solution and make the shot work.

More on this topic next time.

Hal Schmitt's Canvas Gallery Wrap Corner Technique

Canvas Gallery Wrap Techniques - Cutting and Folding the Corners from Hal Schmitt on Vimeo.

Here is a quick video showing Hal Schmitt's corner cutting and folding technique when finishing a canvas gallery wrap.

Hal is working a 24 x 36 gallery wrap with Alpha Strike Matte Canvas photo grade coated with Ambrosia.

Fiat Lux!

Go For It: Pixels are Free

One of my favorite expressions with digital photography is "pixels are free."  With no cost, photographers should enjoy complete freedom to experiment and play.  If you have an idea for a shot, go for it.  If it works, great.  Take what you did and make it a part of your photography. 

If it does not work out, no big deal.  But use the results as a completely free learning experience. Go to school and figure out what was the issue/s.  Can you make a small adjustment or do you need to go back to the drawing board and plan again. 

I recently found myself in a situation where I honestly did not know how the results would turn out.  I wanted to shoot a series of images for a landscape panorama in rapidly falling light levels.  I had the Canon EF 800mm f/5.6L on my 5K Mk II; a combination not often used for panoramas.  To make matters worse I was on the back of a moving boat.  Not only was it moving forward and slowly rocking side to side but we were in a regular ocean swell so we were slowly heaving (up and down.)

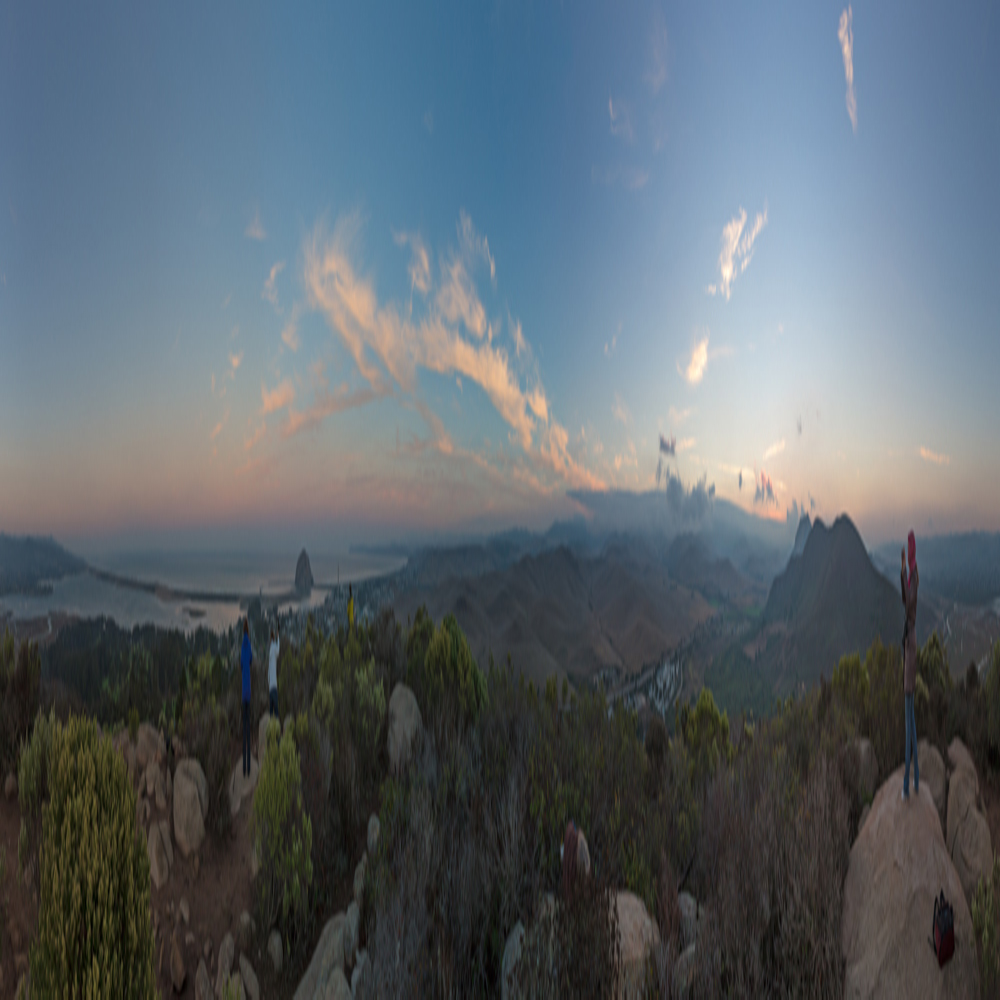
Not the best situation but pixels are free so I went for it.  The results from the 42 shots are shown below. 

This is the panorama after the stitching process.  If you follow the bottom (or top) you will notice a nice sine wave pattern.  That is the boat going up and down with the ocean swell.  My camera support was rock solid (RRS TVC-33 and PG-02) but the boat was out of my control. 

At this point I had a nicely stitched panorama even though it is somewhat ugly in terms of how everything lined up.  But it worked and did not cost a thing. 

After a little cleanup, I had a usable, huge panorama to optimize.  For a free experiment, I will take it.

Fiat Lux!

LR 4 Local Adjustments - Adjustment Brush Example

A quick demonstration of an effective and efficient local adjustment workflow using Lightroom 4's Adjustment Brush feature to optimize Exposure and White Balance.  Although Lightroom is the example software the exact same process is available in Adobe Camera Raw.

Fiat Lux!

Photographing the Solar Eclipse

Photographing the Solar Eclipse

Remember to scout and plan your 20 May eclipse photo-shoot ahead of time.  Things you might want to include in your process: determine when the eclipse will happen in your time zone, determine the sun azimuth and elevation of the sun during the eclipse, plan and frame your shot/composition, determine your solar filter requirements, and take a series of test shots to validate your exposure.

If you wait until the eclipse starts to figure all of this out you might be a bit behind.

Read more on NASA's website for the technical data on the eclipse and where the best viewing regions will be. Who knows! It could be the best in your area!

For those of you photographing the eclipse please submit your images for us to see. The best images will be posted on the blog!

Email them to info@lightworkshops.com and size to 400x600 px (or close to that).

 -Happy Shooting!

Fiat Lux!