The $5 Photo Accessory (that could save your life)

As nature, landscape, and wildlife photographers we often place ourselves in locations and situations that are a bit off the beaten path. When we do go out to make photographs it is worth thinking a little about possible contingencies and how we will handle them should something occur.  As the most basic precaution, I consider one of the least expensive pieces of gear a photography essential, the simple whistle.

In our modern society, we tend to take our safety or our ability to rapidly communicate for granted.  Sometimes that is the case.  For example, if you are out with me you know you are with an instructor who is certified in CPR and first aid, has had extensive survival training, and handles high stress situations well.  More often though, most photographers think if they have their cell phone they are ready and help is just a call away.  But it is amazing how often we find little to no cell coverage, a dead battery, or a situation where the phone is just out of reach.

As a pilot, I learned to plan for contingencies and to prioritize redundancy in safety or communication systems.  To back up your phone one of the simplest preparations you can make is to carry a whistle when you go out to make photographs.  Survival situation after survival situation has proven that a whistle is a "must have" piece of gear.  Look at any list of items you should have in the field or wilderness and a whistle will be on it.  Oh by the way, it is not enough to have the whistle with you, have it on your person and easily accessible with either hand.

Photographers in the field are just like hikers, campers, and other outdoor enthusiasts.  Interestingly, they tend not to think of themselves as such because our hobby, passion, or profession is so dependent on high tech gear.  But in most cases there is no difference. As an example, Hal has a friend in Alaska who recently almost lost his life while out in the wild.  Overcoming incredible odds he was rescued and recovered, but only because of his whistle.  He was in a bad position and the only way he could try and find help was to blow his whistle.  He blew for over an hour and finally someone heard and investigated. They joked afterwards that his whistle was the $2 accessory that saved his life.  Pretty amazing considering the guy had thousands of dollars of other gear with him. It is also worth mentioning that Hal's friend broke one of the cardinal rules, he went out alone without using the buddy system (the topic of another post.)

So when you are packing up the camera, lenses, and tripod, make sure to put a simple whistle in your pocket.  If you ever run across him in the field, ask Hal to see the four essential pieces of shooting gear: Hoodman HoodLoupe, cell phone for DOF calculations/comms, a good knife, and a whistle.

Always remember making the photograph is optional but making it home is mandatory. (Paraphrased from my mountaineering buddies.)

Fiat Lux!

Lightroom 5 Beta Features - Hal's Favorites

The three part video demonstrates and discusses my favorite features of the Lightroom 5 beta.  The full feature list is below but my favorites are: Improved spot removal and retouching, the Radial Filter, improved crop overlay, import functionality, Smart Previews, and Upright for auto lens corrections.

In the video I reference additional keyboard shortcuts for the Spot Removal and Radial Filter tools.  The shortcuts are shown below.

Spot Removal (Q)

-New circle spot (auto-find source): Single click

-New circle spot (user-defined source): Ctrl drag

-New circle spot (scale from center): Ctrl Alt drag

-New circle spot (scale from anchor): Ctrl Shift drag

-Connect two circle spots: Single click + Shift click

-Increase circle spot size: ]

-Decrease circle spot size: [

-New brush spot: Click drag

-Constrain brush spot to straight line: Shift drag

-Cycle Spot Type: Shift + Q

-Auto-Find New Source: /

-Visualize Spots: A

-Hide Spot Overlays: H

-Delete spot: Alt select

-Delete selected spot: Delete

-Delete multiple spots: Alt drag select

Radial Filter (Shift + M)

-New elliptical mask: Drag

-Apply new mask to crop bounds: Ctrl double-click

-Expand existing mask to crop bounds: Ctrl double-click on mask

-Duplicate: Ctrl Alt drag

-Invert elliptical mask: ’ (apostrophe)

-Hide/show guide: H (short press)

-Hide guide on press, show on release: H (long press)

-Apply & dismiss: Double-click on photo

-Delete selected elliptical mask: Delete

Major feature list

-Smart Previews

-PNGs now supported in Lightroom

-New fullscreen mode.  F key is true full screen.  Legacy full screen mode is Shift + F

-Configurable grid overlays for Loupe view

-New searchable criteria for Smart Collections - File size, Image size, Image bit depth, color channels, Color mode, Color profile, Smart Preview statsus, and PNG

-Advanced healing brush for Spot Removal

-Radial Filter

-Upright auto lens corrections

-LAB color readout on histogram.  Right click on the histogram for a flyout menu.

-New book features

I will do additional videos to show some of these upgrade features.

Fiat Lux!

Guest Blog! 5 Food Photography Tips

by Kent Cameron

Food photography has never been more popular. The interest in food and sharing food experiences have been driven by digital cameras, food blogging, Facebook, Pinterest, e-books, cookbook self-publishing and media like Food Network, which have all helped to fuel the food trend.

Following that trend, several years ago my wife, Sally, a professional chef, decided to create a food blog called, A Food Centric Life. She asked if I could use my photography skills to take some shots of her food. I quickly learned that creating great looking food images has its own special set of challenges.

Whether you are a photographer wanting to add food to your portfolio, a cookbook author, a blogger, or anyone interested in shooting food, here are a few tips from my food photography journey that may be helpful in your journey…

Tell a Story

When we prepare for a food shoot, we talk about the story first. The story may be about enjoying some crème brulee and espresso at a bistro in Paris, or grilling burgers in the park for a picnic on a rustic table, or something very simple.​

Ask yourself what the food or recipe means to you? Does it have meaning in your life? What is the setting? Is it a holiday, a seasonal dish, a fami­­­­ly favorite? What props, colors and textures are involved? How will you tell that story to the viewer with your image?

Direct the Light

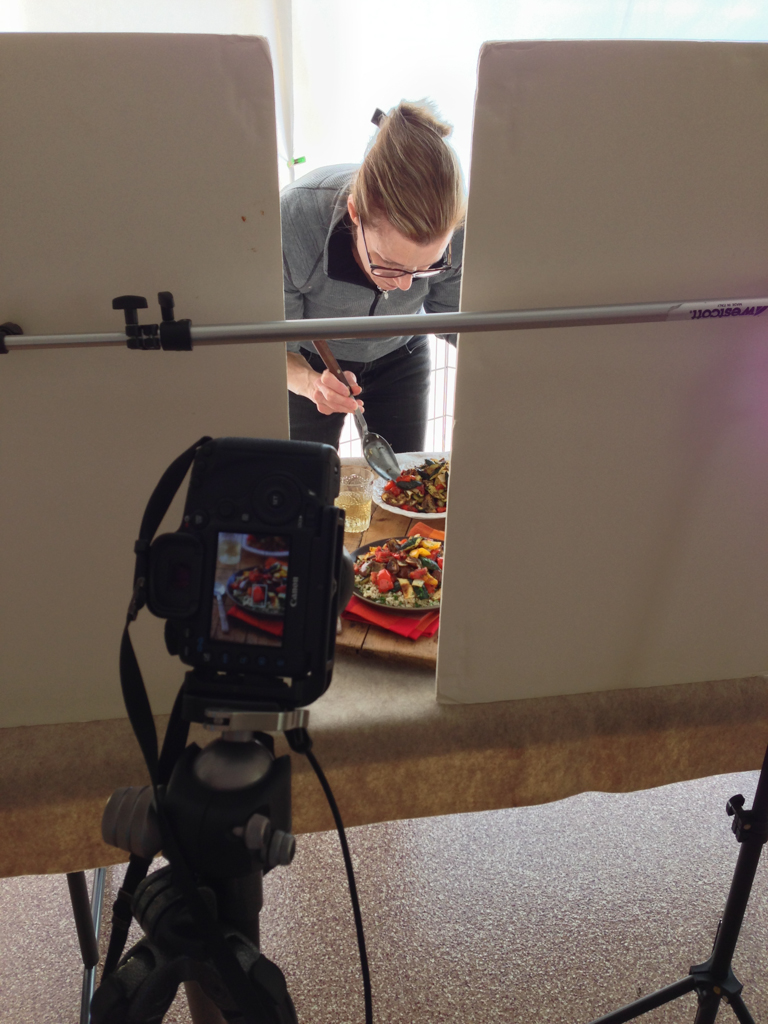
Look for light that has direction. It can be light through a window, or doorway. We often shoot food in our garage with the open garage door creating a large space with directional light. Or, we create directional light using studio lights when natural light is not available.

Set up the shot so that the light is coming from behind or from the side. Think about light direction like the hands on a clock. If the food is at 6:00, backlight is 12:00, and side light is 9:00 or 3:00. Lighting this way creates depth and interest in the food. Never light food directly from the front, and absolutely do not shoot food with a flash mounted on your camera.

Diffuse and Reflect

A common mistake is to over light food images. Once you have created a scene with directional light, then can decide how much highlight and shadow works for the shot. Use a diffuser to soften the light and control highlights. Not all food images use soft light, but it works great for many.

Use a reflector to control the amount of shadow. We use pieces of basic foam core board that you can buy at any art supply stores as a reflector. Position the foam core opposite the light. Use white foam core to reflect light and brighten the shadows, and black foam core to take light away, creating deeper shadows. It's amazing what you can do with your food images by just experimenting with reflectors.

Work the Composition

Amazingly subtle changes in your composition can make or break your image, so really work your shot angles, direction of the light, placement of the food and props in the shot. Use the composition rule of thirds and avoid placing food dead center in the frame.

Style the Food

The job of a food stylist is to make the food look its best for the camera and create direction or flow of movement for the eye. Unless you are working a well budgeted food shoot, likely the food stylist is you! I am fortunate that my wife, Sally, is a chef so preparing and styling the food is her department. 

Buy top quality food and ingredients. You want beautiful food for beautiful food photos. When styling, think how you can create movement in the image. Add a flowing napkin with complementary color, for example, or maybe a utensil. Think about how you can add textures and create lines that draw the viewer's eye into the food scene.

Learn More about Food Photography

Kent and Sally Cameron work as a team, blending their love for great food, photography, and teaching to produce beautiful images that inspire and educate people about food.
Orange Ginger Creme Brulee.jpg
Turkey Burgers.jpg
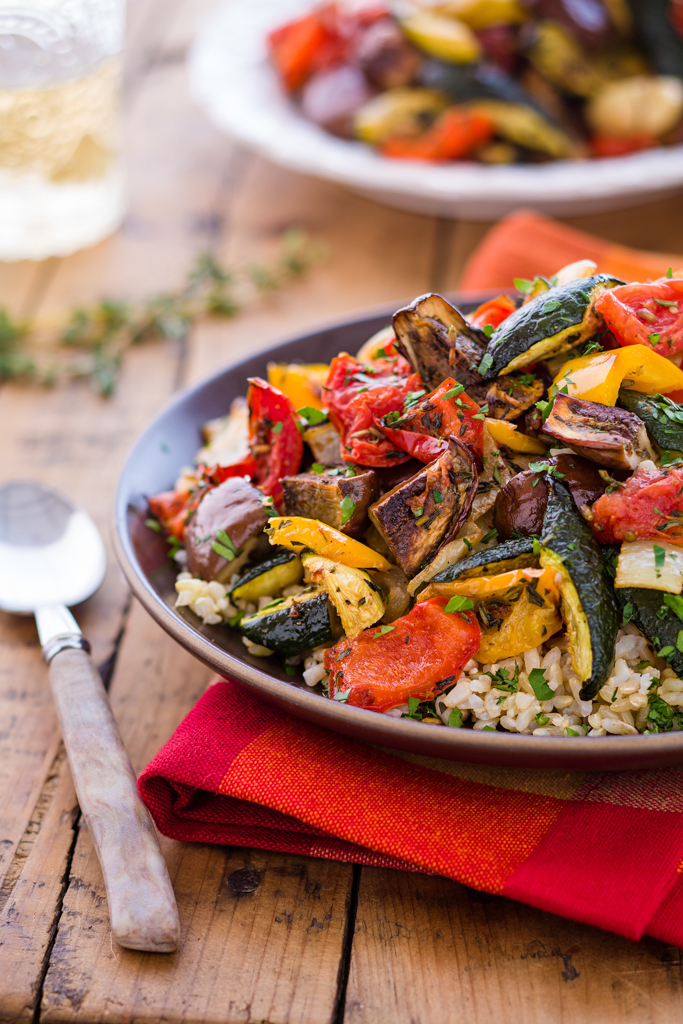
Roasted Ratatouille.jpg